Dishwasher Leak from Door: Urgent Troubleshooting Guide
Urgent, step-by-step troubleshooting to stop a dishwasher leak from the door. Learn common causes, quick fixes, and when to call a pro. Practical, AI-informed guidance from Dishwasher Tips to prevent water damage.

The most likely cause of a dishwasher leak from the door is a worn or mis-sealing door gasket that fails to create a tight seal. Start by inspecting the gasket for cracks, tears, or deformation. If the gasket looks intact, check door alignment and hinge screws, then run a short test cycle to observe leakage. If water still escapes, follow the diagnostic flow below.
Why a Dishwasher Leaks from the Door
Water pooling around a closed dishwasher during or after a cycle is alarming. According to Dishwasher Tips, door leaks are most often traced to a worn seal or to a door that isn't sealing properly. If you’re dealing with a dishwasher leak from the door, you’re not alone. The most common culprits include a door gasket that has dried out or cracked, a door that doesn’t seat evenly, a faulty latch, or a level issue that tilts water toward the front. In this urgent guide, we’ll walk you through a practical, step-by-step approach to identify the exact cause and stop the leak fast. You’ll learn how to inspect the seal, perform safe tests, and apply the right fix—without overly complicated tools or guesswork. Start with a quick visual check for obvious signs of wear, then follow the diagnostic flow to test each potential fault. The goal is to stop the leak quickly and prevent water damage to your kitchen floor or cabinet base.
Quick Safety Checklist Before You Start
Before you touch anything, prioritize safety. Unplug the dishwasher or switch off the circuit breaker to eliminate the risk of electric shock. If you suspect a flood risk, turn off the water supply to the machine. Keep children and pets away, and have towels or a shallow bucket ready to catch drips. If you see exposed wires or damaged components, do not proceed; contact a qualified technician. This short safety window protects you as you perform the checks described below.
Common Causes at the Door Seal and Hinge
Door leaks usually fall into a handful of near-universal causes. A worn or cracked door gasket or seal is the top offender and often shows as dampness along the door seam. A misaligned door or loose hinge screws can prevent the door from sealing evenly. A faulty latch can leave the door ajar or partially unsealed, creating a path for water to escape during cycles. Finally, overloading or placing large pots near the door can cause splashing that makes water pool at the front. In many cases, a combination of issues is at play, so a systematic check is essential. Dishwasher Tips analysis notes that the door gasket wear is a frequent culprit and that alignment problems commonly accompany leaks.
How to Inspect the Door Gasket and Seal
Begin with a visual and tactile inspection. Open the door and run your fingers along the gasket all around the frame, looking for cracks, tears, brittleness, or deformations. Shine a flashlight at the seal’s edge to catch hairline cracks or gaps you might miss in daylight. Wipe away any buildup of detergent or mineral deposits with a mild soap solution and a soft cloth. If you find damage, plan for gasket replacement; if you find nothing obvious, test the seal by pressing gently on the gasket while the door is closed and running a short cycle to observe whether water escapes from any seam.
How to Test for Leaks (Non-destructive)
To test safely, run a short cycle with minimal water and observe closely where the leakage begins. Place a dry towel along the door edge and stand to the side so you can see the seam as water accumulates. Use a flashlight and, if necessary, a thin mirror to inspect the door corners and gasket contact points during the cycle. If you notice drips along the gasket or seam, mark the spot and rerun the test with the door slightly opened to verify whether water escapes from the door area or from a different component. If the leak persists after a thorough gasket inspection, move to the diagnostic flow and fixes below.
Step-by-Step Quick Fixes You Can Try Tonight
Start with the simplest fixes and progress to more involved ones. First, clean the gasket and door frame to remove dirt and soap scum that can prevent a proper seal. Next, re-seat the door by closing it firmly and ensuring even contact around the gasket. If the door remains loose or misaligned, tighten or adjust the hinge screws and verify the door sits squarely against the frame. For cracks or deformation in the gasket, replace the gasket according to your model’s instructions. Finally, avoid overloading the bottom rack to minimize spray that can spray water toward the door. If the leak continues after these steps, consider a latch replacement or professional service.
Prevention Tricks to Stop Leaks in the Future
Routine maintenance is your best defense against door leaks. Inspect the gasket seasonally for cracks and stiffness, clean the door frame to remove buildup, and ensure the door closes squarely each time. Don’t overload the dishwasher or position items so they interfere with the door seal. Use a level to verify that the unit sits evenly—an unlevel machine can force water toward the door during cycles. If a leak recurs after a repair, schedule a professional inspection to check the door hinge’s structural integrity and seal assembly.
When to Call a Professional
Some leaks are easy to fix; others require specialist tools or replacement parts. If the door gasket is visibly cracked or deformed, if the door won’t close evenly after adjusting hinges, or if water continues to seep with the door firmly shut, it’s time to call a professional. A technician can replace the gasket, realign the door, or assess fundamental structural issues in the door or cabinet that DIY methods cannot safely address.
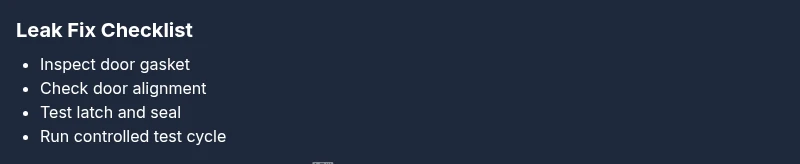
Troubleshooting Flow Summary
A quick recap of the diagnostic flow: inspect gasket, test door contact, verify alignment, check latch, run a controlled cycle, and escalate to professional help only when gasket and alignment repairs do not stop the leak. This approach minimizes water damage and ensures you make a precise, safe repair.
Steps
Estimated time: 60-90 minutes
- 1
Power down and isolate water supply
Unplug the dishwasher and shut off the water supply to prevent shocks and further leaks. If water is pooling, mop or absorb first to keep the area safe while you inspect. This step protects you before any hands-on work begins.
Tip: Use the kitchen towel to stay dry and keep your workspace clear. - 2
Inspect the door gasket and seal area
Close the door and visually inspect the entire gasket for cracks, tears, or stiffness. Run a finger along the edge to feel for hard spots. Any damage means gasket replacement is likely needed.
Tip: Look for hairline cracks that aren’t obvious at a quick glance. - 3
Clean or replace the gasket
If the gasket is dirty, clean with mild soap and water. If damaged, plan for a gasket replacement following your model’s manual. A clean, properly seated gasket seals far more effectively.
Tip: Don’t use harsh cleaners that can degrade rubber. - 4
Check door alignment and hinges
Ensure the door sits flush against the frame when closed. Tighten any loose hinge screws and check for a crooked door. A misaligned door often leaks at the seal.
Tip: Use a level and compare left vs. right gaps when closed. - 5
Test the latch/strike plate
Inspect the latch and strike plate for wear or looseness. Replace worn components so the door stays fully shut during cycles.
Tip: If the latch feels loose, avoid running a cycle until fixed. - 6
Run a controlled test cycle
After fixes, run a short, low-water cycle with a dry area around the door to confirm the leak is resolved. Observe the seam closely and note any dampness.
Tip: Keep towels handy during the test.
Diagnosis: Water leaking from dishwasher door during or after cycle
Possible Causes
- highWorn or damaged door gasket/seal
- mediumDoor not closing fully due to misalignment or loose hinges
- mediumFaulty door latch or strike plate
- lowOverloading leading to water splashing toward the door
Fixes
- easyInspect gasket for cracks or deformation and replace if damaged
- easyRealign door and tighten hinge screws to ensure full contact with gasket
- mediumReplace faulty door latch or strike plate as needed
- easyReduce load size and avoid blocking the door path to minimize splashing
People Also Ask
Why is my dishwasher leaking from the door?
Leaks from the door are usually caused by a worn or mis-sealing gasket, door misalignment, or a faulty latch. Inspect each element and test with a mild cycle to pinpoint the source.
Leaks from the door are usually due to worn seals or misalignment. Inspect the gasket, door, and latch.
Can a door gasket wear cause frequent leaks?
Yes, a cracked or deformed gasket is the most common cause of door leaks. Replace if damaged.
Yes; worn gaskets cause leaks.
Is it safe to run the dishwasher if it leaks?
If water is pooling around the door, stop and unplug; continue only after the leak is addressed; avoid electrical hazards.
No, stop and unplug first; fix before running again.
How much does a door seal replacement cost?
Costs vary; consult a pro or repair guide; parts and labor can differ by model and region.
Costs vary; talk to a repair pro.
How do I test if the door seal is damaged?
Inspect for cracks or deformation; run a gentle water test along the seam with the door closed to see if it leaks.
Inspect the seam, then perform a gentle water test.
Will overloading cause leaks from the door?
Overloading can splash water toward the door and create leaks. Space items evenly and avoid blocking the door.
Yes, overloaded loads can splash water by the door.
Watch Video
What to Remember
- Check door gasket first and replace if damaged
- Ensure door closes squarely and is level
- Test with controlled cycles after every fix
- Call a pro for hinge/structural issues beyond basic gasket work