Dishwasher Leaking from Bottom Left Corner: Troubleshooting Guide
Urgent guide to diagnose and fix a dishwasher leaking from the bottom left corner. Practical checks, safe steps, and when to call a pro. Learn signs, causes, and prevention with Dishwasher Tips.

A leak from the bottom left corner usually points to a loose drain hose, a faulty door seal, or an overflowing tub contacting the outer shell. Start with safe, simple checks: unplug the unit, inspect the door gasket for cracks, and tighten any hose clamps. If the leak persists, shut off the water supply and call a professional.
Common Causes of a Leak at the Bottom Left Corner
Water leaks at the bottom left of a dishwasher are most commonly caused by a loose or detached drain hose, a worn or damaged door seal, or a misaligned tub that touches the outer cabinet. Detergent suds can overflow and trap water near the left corner if the sump is blocked or the filter is clogged. In some models, a cracked tub gasket or a failed inlet valve can also manifest as a leak that pools at the bottom left. Inspecting for visible cracks, loose clamps, and stray water paths helps narrow the suspect list. Remember that many leaks originate from simple, overlooked issues rather than a full component failure, so start with the easiest checks first.
Immediate Checks You Can Do Safely
Safety first: unplug the dishwasher and turn off the water supply before touching any components. Look for pooling water near the left toe-kick area and wipe it away to observe whether water returns from the same spot. Check the drain hose at the back or under the machine for kinks, cracks, or loose clamps; reseat and secure any connections you find. Examine the door seal for obvious cracks or debris that prevents a tight seal. A quick wipe with a damp cloth can reveal if water is migrating from the gasket or from a separate source. If you notice water only when the dishwasher is running, the issue is likely related to the door seal, hose, or valve rather than external factors.
How to Inspect the Door Seal and Gasket
The door gasket forms the primary barrier against leaks. Remove any visible debris and examine the entire gasket for cracks, tears, or sticky residue that suggests buildup. A damaged gasket often shows small gaps when the door is closed or leaves a visible seam when the door is shut. Clean the gasket with a mild detergent and warm water; if cracks remain, replace the gasket following the manufacturer’s instructions. Ensure the door latch aligns properly and that the door closes fully without forcing it. If the gasket has become brittle, replacement is typically the most reliable fix.
Inspecting Hoses, Pumps, and the Tub
Leaks can originate from the drain hose, inlet hose, or pump seals. Inspect the drain hose at both ends for cracks or loose clamps; tighten or replace as needed. Check the hose from the dishwasher to the sink or disposal for kinks or punctures. Look at the sump area for residue that could indicate a leak from the pump seal or a cracked tub. If you observe spray or mist while the pump runs, the pump seal or impeller could be failing. Tighten hose connections and replace damaged components to restore a watertight system.
Common Plumbing and Installation Issues
A dishwasher not level or installed too close to cabinets can cause water to pool in the left bottom corner as the tub slants and leaks through gaps. Verify the machine is level using a carpenter’s level on the top edge, adjusting the front legs as needed. Ensure the drain line is properly routed and that there is a high loop or air gap if required by local codes. Improper dishwasher placement, incorrect drain height, or a misaligned mounting bracket can contribute to leaks that manifest near the bottom left.
When to Test for Leaks and Where Water is Collecting
To confirm the exact origin, perform a controlled test: run a short wash cycle with the door closed and observe for fresh water leaks. Place a dry towel under the unit to catch seepage and mark the water path with a piece of chalk or tape. If water only appears while the pump is active, the seal, hose, or pump-related component is the likely culprit. Use food coloring in the rinse cup to trace water flow, but avoid misinterpreting condensation as a leak. Accurate observation reduces unnecessary part swaps.
What to Do If Water Continues Leaking
If leaks persist after basic checks, photograph the leak paths and compare against common failure points in your model’s manual. Tighten or replace the faulty hose clamps and seals, and confirm electrical safety by unplugging the unit between work sessions. If you hear unusual noises, notice excessive vibration, or water leaks from internal components, discontinue use and call a qualified technician. Do not attempt major repairs beyond your comfort level—improper handling can create hazards.
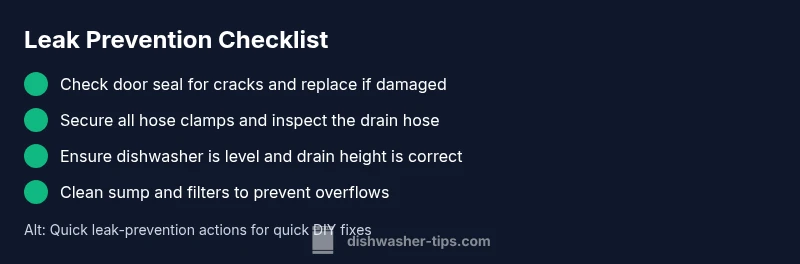
Preventive Steps to Avoid Future Leaks
Regular maintenance reduces leak risk: periodically clean the sump, filters, and spray arms to prevent clogs that can back up into the left corner. Inspect and replace worn door gaskets on schedule, and use the correct detergent to minimize suds. Ensure the dishwasher is level and that you have a proper drain connection. Finally, keep the area around the unit dry and check hoses for wear every few months to catch issues before they escalate.
Steps
Estimated time: 20-45 minutes
- 1
Power down and safety check
Unplug the dishwasher and shut off the water supply. This prevents electrical hazards while you inspect hoses, seals, and the tub. Keep a towel handy to absorb spilled water.
Tip: If you smell gas or see damaged wiring, stop and call a professional. - 2
Check door gasket integrity
Open the door and inspect the full gasket for cracks or deformities. Clean any residue that might prevent a snug seal. If you see damage, plan for gasket replacement.
Tip: Test seal by closing door on a sheet of paper—if it slides out easily, the seal may be worn. - 3
Inspect drain and inlet hoses
From the back or under the toe-kick, examine drain and inlet hoses for cracks, bulges, or loose clamps. Tighten clamps securely and replace any damaged hose sections.
Tip: Check hose connections from both ends; a loose clamp is a common leak source. - 4
Check for tub or sump cracks
Look for visible cracks in the tub or sump area, especially near the left corner. If you see a crack, do not use the machine until a professional assesses the repair options.
Tip: A crack may require professional replacement of the tub assembly. - 5
Level and drain height verification
Place a level on the top edge to confirm level; adjust legs if necessary. Ensure the drain hose has an adequate high loop or air gap according to local codes.
Tip: Even small leveling errors can cause leaks at the base. - 6
Run a test cycle
After reassembling, run a short cycle with the unit empty to observe whether leaks persist. Note any new water paths and adjust again if needed.
Tip: Monitor for several minutes before concluding it’s fixed.
Diagnosis: Water leaking from bottom left corner when the dishwasher runs
Possible Causes
- highLoose or damaged drain hose connection
- highWorn door gasket or misaligned door seal
- mediumTub or sump crack causing interior water to reach the left edge
- lowImproper installation causing misrouting of hoses or level issues
Fixes
- easyTighten all hose clamps and reseat connections; replace damaged hoses
- easyReplace the door gasket or reseat the door for a proper seal
- hardInspect tub/sump for cracks and schedule professional replacement if needed
- mediumRelevel unit and verify drain height/installation per manual
People Also Ask
What is the most common cause of a dishwasher leaking from the bottom left corner?
The door gasket or drain hose is typically responsible for leaks seen near the bottom left corner. Cracks, gaps, or loose connections can allow water to escape during cycles.
Usually the door gasket or drain hose causes leaks near the bottom left corner. Cracks or loose connections allow water to escape during cycles.
Can I fix a leaking dishwasher myself?
Many leaks come from simple parts like the door seal or hoses and can be fixed by a confident DIYer. Always unplug the unit and turn off water supply before starting. If the tub or main seal is damaged, consider professional help.
Yes, many leaks come from door seals or hoses you can replace yourself, but turn off power and water first. If the tub is damaged, call a pro.
How can I tell if water is leaking from a hose or the tub?
Observe the water path during a test cycle. If water pools near the left toe-kick, it’s often a hose connection or door seal. If it appears after splash or pump action, the tub or sump may be at fault.
Watch where the water collects during a test run to distinguish hoses from tub issues.
When should I call a professional?
If you detect cracks in the tub, persistent leaks after checking hoses and seals, or if the unit requires disassembly beyond your comfort level, schedule a service call.
Call a professional if there are tub cracks or leaks remain after checks.
Can improper installation cause leaks at the bottom left?
Yes. An uneven installation, incorrect drain height, or hose routing can funnel water to the left bottom area. Relevel and verify hose routing to reduce this risk.
Yes—install issues can direct water to that corner; fix leveling and routing.
Watch Video
What to Remember
- Identify the leak source early by tracing water paths.
- Door seals and drain hoses are the most common culprit.
- Leveling and proper drain setup prevent most future leaks.
- If water continues after checks, call a pro for tub or seal replacement.
- Regular maintenance reduces recurring leaks.