How to Unclog a Dishwasher Drain: A Practical Guide
Learn safe, practical methods to unclog your dishwasher drain. From filter cleaning to drain-snakes, this guide walks homeowners through diagnosis, clearing the clog, and preventing future drain problems.

To unclog a dishwasher drain, begin by cleaning the filter and removing all visible debris. Check the drain hose for kinks or obstructions, then detach and inspect the hose. If the clog remains, insert a hand auger or drain snake into the drain line and rotate to break up the blockage. Finish by flushing with hot water and a splash of vinegar.
Common Causes of Dishwasher Drain Clogging
Dishwasher drains clog most often due to debris accumulating where water collects: the filter, sump, and drain hose. According to Dishwasher Tips analysis, the two most frequent culprits are clogged filters and obstructions in the drain hose that prevent water from exiting the basin. Leftover food particles, rice, or pasta can form a sticky layer that traps grease and soap scum over time. Hard water minerals can also contribute by depositing crusty rings on the pump and inlet screens.
Another frequent factor is the connection to the garbage disposal or sink drain. If the disposal unit is clogged or the knock-out plug is not removed, water may back up and push waste back into the dishwasher, creating a partial or complete clog. Detergent use matters too: too much powder or pods that don’t dissolve completely can leave insoluble residues that trap debris. Finally, improper cleaning routines—like running full cycles on a dirty dishwasher—allow odors and gunk to build up in the sump.
In many homes, simple maintenance routines prevent most clogs. Regularly cleaning the filter after every few cycles, inspecting the drain hose for kinks, and flushing the system with a hot-water rinse can keep the drain moving freely.
Safety First: Prep and Power Down
Before you touch any components, power down the unit completely. Unplug the dishwasher or switch off the circuit breaker dedicated to the appliance, and shut off the under-sink water valve if accessible. Wearing rubber gloves and keeping a towel handy helps protect you from sharp edges and water spray. Safety is the top priority because energized electrical components and pressurized water can create hazards. If you’re unsure about power, consult the manual or a professional.
Punch-list for safety:
- Unplug or switch off at the breaker
- Turn off the water supply to the dishwasher
- Keep children and pets away during maintenance
- Have a bucket and towels ready for spills
Tools, Materials, and Setup
Gather the tools you’ll need before starting. A clean workspace makes the job safer and faster. The essential tools include a pair of dishwasher-safe gloves, a bucket or tray to catch water, a hand auger/drain snake, towels for spills, and a soft brush for scrubbing. Optional but helpful items are vinegar or baking soda for deodorizing and a camera or note pad to document the reassembly process. Having everything at hand reduces the risk of mid-task trips to the hardware store, which can introduce more debris into the system.
Layout a clear workspace near the sink, remove the lower rack, and place towels around the base for noise reduction and spill control.
Step-by-Step Diagnosis and Cleaning
Carefully inspect the filtered area and sump. Remove the filter and rinse it under warm running water, using a soft brush to dislodge stuck debris. Wipe the sump rim with a damp cloth and examine the interior walls for stubborn residue. Trace the drain path from the dishwasher to the sink drain, observing for visible clogs. If you notice a clog in the filter or sump, clear it first because this often solves the majority of drainage issues. Once you’ve cleared obvious debris, reassemble temporarily to test drainage flow with a short wash cycle at no load to observe the behavior.
Take your time with this inspection; rushing can push debris deeper into the line and increase the chance of a repeat clog.
Clearing the Drain: Methods that Work
If debris persists after cleaning the filter, it’s time to address the drain line itself. Start with a hand auger or drain snake: insert gently into the drain, rotate to dislodge material, and pull back any caught particles. Avoid forcing the auger; resistance can indicate a more substantial blockage or a misaligned hose. For minor blockages, a hot-water rinse with a splash of white vinegar can help loosen soap scum and mineral buildup. If the dishwasher is connected to a garbage disposal, run the disposal briefly to clear the air gap and ensure the disposal won’t push back into the dishwasher. Do not use chemical drain cleaners in dishwashers; they can damage seals and pumps.
Reattach all connections securely before testing. Run an empty cycle first to confirm that water drains properly and there are no leaks.
Preventing Future Clogs and When to Call a Pro
Prevention is simpler than repeated unclogging. Clean the filter regularly—ideally after every 1–2 cycles—and inspect the drain hose for kinks at least every few months. Use the right amount of dishwasher detergent; excessive amounts can contribute to soap scum and residues, particularly with hard water. If you notice slow draining that recurs despite cleaning, or if you have repeated backups into the sink, consider calling a professional. Persistent clogs may indicate a more complex problem such as a clogged pump, a damaged hose, or an issue at the disposal connection that requires specialized tools.
Quick Reassembly and Final Test
With the drain confirmed clear, reassemble the filter and lower rack, ensuring all clips and locks engage correctly. Reconnect the drain hose and supply line, then run a short empty cycle with hot water to verify that the drain is functioning normally. Check for leaks around the seals and gaskets, especially where hoses connect to the appliance and the sink. If you notice any residual odor, run a second hot-water rinse with a tablespoon of baking soda to deodorize the sump. When in doubt, consult the manual or a professional plumber.
How to Maintain a Clog-Free Dishwasher Going Forward
Establish a simple maintenance routine that minimizes future clogs: clean the filter weekly or every other week, flush the line with hot water between cycles, and use the correct detergent quantity for your water hardness. Consider installing a water conditioner if you live in a hard-water area to reduce mineral buildup on interior components. Finally, avoid putting large food particles, bones, or fibrous material into the dishwasher’s drain-friendly areas and ensure the garbage disposal is cleared before running the dishwasher if connected.
Summary and Next Steps
Unclogging a dishwasher drain is usually straightforward when you tackle it in stages: protect yourself, inspect, clean, clear the line, and test. Consistent maintenance reduces the likelihood of recurrence and extends the life of the appliance. If you experience repeated problems after following these steps, a professional assessment may identify hidden failures such as a compromised pump seal or a damaged hose.
How to Reassess after Completion
After completing the steps, monitor several cycles to ensure consistent drainage. If you still observe slow drainage, backtrack to verify the hose’s route and ensure you never introduced new debris into the line during cleaning. Keep a small maintenance log to track when you last cleaned filters, hoses, and connections.
Final Note on Best Practices
Always prioritize safety and avoid caustic cleaners in dishwashers. Use only manufacturer-approved parts and follow the manual for disassembly. Consistent, proactive maintenance is the best defense against clogs and costly repairs.
Tools & Materials
- Dishwasher-safe gloves(Latex or nitrile; protect hands and improve grip)
- Bucket or tray(To catch water and debris during cleaning)
- Hand auger / drain snake(8-12 inches; plastic or metal shaft)
- Soft brush or old toothbrush(For scrubbing filter surfaces)
- Towels or rags(To absorb spills and wipe surfaces)
- Vinegar or baking soda(Optional for deodorizing and gentle flushing)
Steps
Estimated time: 45-60 minutes
- 1
Power down and prepare
Unplug the dishwasher or switch off the circuit breaker. If safe, shut off the water supply under the sink. This is essential to prevent any accidental shocks or leaks while you work.
Tip: Safety first; never work on a live electrical appliance. - 2
Expose the drain path
Remove the lower rack to access the filter and sump area. Examine the area for obvious debris and take a quick photo to guide reassembly.
Tip: Documenting the setup saves time when you put it back together. - 3
Clean the filter and sump
Remove the filter assembly and rinse under warm water. Use a soft brush to scrub away grime and wipe the sump where debris collects.
Tip: Avoid harsh chemicals that could damage seals. - 4
Inspect drain hose and connections
Follow the hose from the dishwasher to the sink drain or disposal, looking for kinks or blockages. If connected to disposal, run it briefly to clear the air gap.
Tip: Even small bends can block water flow; straighten them gently. - 5
Clear with a hand auger
Insert the auger into the drain, push slowly and rotate to break up debris. Do not force past resistance; withdraw and reattempt as needed.
Tip: A gradual, deliberate motion reduces risk of damage. - 6
Test flow and reassemble
Reconnect hoses, run a hot-water cycle with the dishwasher empty. Check for leaks and observe drainage. If slow drainage persists, repeat steps or seek professional help.
Tip: Run an empty cycle first to verify everything works.
People Also Ask
What causes a dishwasher drain to clog?
Clogs most often come from filtered debris, hose obstructions, and mineral buildup. Garbage disposal connections and detergent residues can also contribute. Regular filter cleaning and hose checks prevent many clogs.
Most dishwasher clogs happen because debris builds up in the filter or drain hose, or minerals accumulate. Regular cleaning helps prevent it.
Can I use chemical drain cleaners to unclog a dishwasher drain?
Chemical drain cleaners are not recommended for dishwashers; they can damage seals and pumps. Use mechanical methods like a hand auger and hot-water flushes instead.
No—chemical cleaners can harm your dishwasher’s seals and pump. Try manual clearing and hot-water rinses instead.
Is it safe to use vinegar or baking soda to clear a clog?
Vinegar and baking soda can help deodorize and loosen minor buildups, but they are not a cure-all for stubborn clogs. Use as a supplementary flush after mechanical clearing.
Vinegar and baking soda can help with minor buildup, but they won’t clear a stubborn clog on their own.
When should I call a professional?
If clogs persist after DIY steps, or you notice water leaks, unusual noises, or recurring backups, it’s time to get a professional assessment. A specialist can inspect the pump, seals, and disposal connections.
If it still clogs after DIY steps or you see leaks, call a professional for a thorough check.
Will a clogged drain affect performance in the long term?
Yes. Repeated clogs can lead to poor drainage, odors, and potential damage to seals and the pump. Regular maintenance reduces the likelihood of future problems.
A clogged drain can cause ongoing drainage problems and damage if ignored, so maintenance is key.
Watch Video
What to Remember
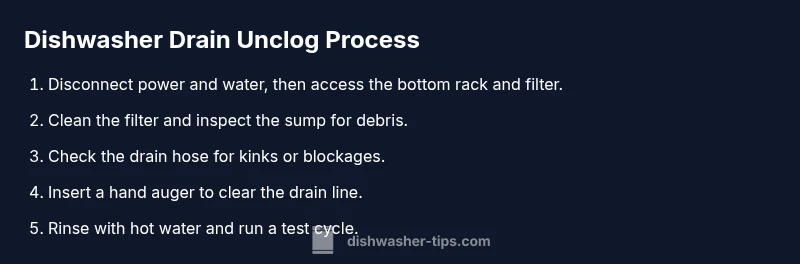
- Power down before starting any work
- Clean and inspect the filter to prevent future clogs
- Check the drain hose for kinks or blockages
- Use a hand auger carefully to clear debris
- Test with a hot-water cycle to confirm drainage