How to Clean a Dishwasher Drain: A Practical Guide
Learn a practical, safe method to clean a dishwasher drain, remove clogs, and prevent backups with tools, steps, and maintenance tips from Dishwasher Tips.

This guide shows you how to clean a dishwasher drain to restore drainage and prevent backups. You’ll need basic tools, a bucket, gloves, and a safe drain-cleaning approach that avoids harsh chemicals. Follow a simple, step-by-step method to remove clogs, flush the line, and test your dishwasher for proper drainage.
Why cleaning the dishwasher drain matters
A dishwasher can function well for years, but the drain line deserves regular attention. When the drain becomes obstructed, you may notice standing water in the tub, slow drainage, or a sour odor bubbling up from the bottom. Regular cleaning helps prevent mold growth and backups that can spill into the cabinet beneath. According to Dishwasher Tips, routine drain maintenance is a simple way to protect your appliance investment and maintain hygiene in your kitchen.
Most clogs start with the filter and trap collecting food particles, grease, and small scraps. If those particles aren’t removed regularly, they can harden into a stubborn plug that inhibits proper wastewater flow. A partially blocked drain forces the pump to work harder, which can shorten the life of the motor and waste energy. This section explains why proactive cleaning matters: it reduces odors, improves drainage performance, and minimizes the chance of water damage under the sink. Look for signs such as water pooling after a cycle, gurgling sounds, and persistent dishwasher smells. The Dishwasher Tips team emphasizes that small, consistent cleanings beat major repairs later, and that a clean drainage pathway helps preserve dishwasher efficiency over time.
Safety and prep before you begin
Safety comes first when you’re working around electrical appliances and water under the sink. Unplug the dishwasher from its power outlet and, if accessible, switch off the hot water supply at the valve. Do not work on the unit while it’s powered. Open the door to inspect for water and prepare a dry workspace. Remove the lower rack to expose the drain area, and place a towel or small tray to catch any splashes. Keep pets and children away. This prep minimizes the risk of shock, slip hazards, and accidental discharge of dirty water. By taking these precautions, you’ll be ready to inspect the drain path, filter, and trap with minimal mess.
Tools and materials you’ll need
- Rubber gloves (required) — Protect your hands from dirty water and sharp edges.
- Bucket or dishpan (required) — Catch standing water and debris during disassembly.
- Flashlight or phone light (required) — See into dark corners under the sink and inside the tub.
- Screwdriver or pliers (required) — Loosen trap fittings and access the drain path.
- Old toothbrush or small brush (required) — Scrub the trap, filter, and hose to remove stubborn grime.
- Towels or rags (required) — Keep the workspace dry and prevent spills.
- Waste bag or trash can (required) — Discard debris safely.
- Optional: wet/dry vacuum (not required) — Useful for removing remaining water if the sink is full.
Note: Set up a dedicated workspace so you can clean efficiently and minimize mess. A well-organized toolkit speeds up the process and reduces frustration.
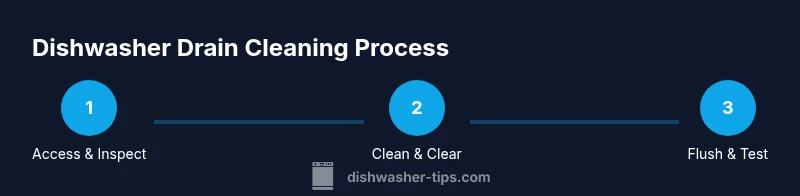
Step-by-step overview of the drain-cleaning approach
During the actual procedure, you will locate the trap, remove debris, check the hose, and flush the system with hot water. The steps below give you a framework to follow, but the formal, detailed steps are in the STEP-BY-STEP block for clarity and safety. This overview helps you understand how the pieces fit together: access the drain, remove the filter, clear the trap, inspect the hose and air gap, and flush the line. Keep a towel ready for spills and a trash bag handy for debris. Remember that a clean drain pathway improves drainage efficiency and reduces the workload on the pump, which helps the dishwasher last longer.
If you feel unsure at any point, pause and refer to the Step-by-Step section for explicit actions and tips. The goal is a clear, debris-free path that allows water to drain quickly and completely after each cycle.
Common issues and troubleshooting
Even after a cleaning, some problems persist. A frequent culprit is a stubborn trap clog or a kinked drain hose that restricts flow. Residual food particles can re-accumulate if the filter isn’t seated correctly or if the trap isn’t fully cleared. Odors often indicate mold growth in the drain path or inside the filter housing. Another issue is a blocked air gap in dishwashers connected to a disposal or sink drain; when air cannot flow, the drain can back up. Inspect for standing water in the trap, unusual sounds during draining, and slow clearing of water after a cycle. If you notice repeated clogs, inspect the discharge hose’s routing under the sink for kinks or a damaged line. Safety note: never use harsh chemical drain cleaners in a dishwasher, as they can damage hoses, gaskets, and the pump.
Maintenance tips to prevent future clogs
Regular maintenance makes a big difference. Clean the filter and interior of the dishwasher monthly if you use it daily, or quarterly for lighter use. Rinse food debris from dishes before loading, and avoid letting sauces or fibrous foods enter the drainage path. After cleaning, run a hot water cycle with the heat setting to help flush debris from the line. Consider a quarterly inspection of the drain hose and air gap to ensure there are no cracks or kinks. If your water is hard, a routine rinse with hot water followed by a baking soda flush can help. Keeping a drain-path map under the sink can help you identify where to look for clogs quickly.
The Dishwasher Tips team emphasizes routine maintenance as a key to long-term reliability and peace of mind.
When to call a professional
If water continues to back up after cleaning, if you notice a strong odor that returns quickly, or if you see frequent clogs despite regular maintenance, it’s time to call a professional. A licensed plumber can diagnose issues beyond the trap and hose, such as a venting problem or a deeper line obstruction. If you have a disposal, ensure it’s clear of debris as interference from the disposal can mimic a drainage issue. The Dishwasher Tips team recommends not delaying professional help when a recurring problem emerges, since persistent drainage problems can indicate larger plumbing or appliance issues.
Authority sources
- U.S. Environmental Protection Agency (EPA): https://www.epa.gov
- University Extension Program (example): https://extension.illinois.edu
- Occupational Safety and Health Administration (OSHA): https://www.osha.gov
Tools & Materials
- Rubber gloves(Protect hands from dirty water and sharp edges)
- Bucket or dishpan(Catch standing water and debris)
- Flashlight or phone light(Inspect dark corners under the sink)
- Screwdriver or pliers(Loosen trap fittings and access drain path)
- Old toothbrush or small brush(Scrub the trap, filter, and hose)
- Towels or rags(Keep workspace dry and prevent spills)
- Waste bag or trash can(Discard debris safely)
- Optional: wet/dry vacuum(Useful for removing remaining water)
Steps
Estimated time: 30-45 minutes
- 1
Power off and access the drain
Unplug the dishwasher and, if possible, shut off the hot water supply. Remove the lower rack to reveal the drain area and filter, and lay a towel to catch any water that spills.
Tip: Verify power is off at the outlet to avoid partial energization during disassembly. - 2
Remove and inspect the filter
Take out the filter assembly and rinse it under warm running water. Remove loose debris with your gloved fingers or a brush and set the filter aside to dry.
Tip: Do not force the filter; if it’s tight, use a screwdriver gently to loosen the housing. - 3
Clear the drain trap
Place a towel beneath the trap, unscrew the trap cap, and remove accumulated debris. Rinse the trap thoroughly and wipe the interior with a brush.
Tip: Be prepared for dirty water; have the bucket ready to catch splashes. - 4
Check the drain hose and air gap
Trace the hose from the drain to the wall. Detach the hose end if feasible and inspect for kinks or blockages. Clean the exterior before reattaching.
Tip: Avoid bending or pinching the hose; a smooth path prevents future clogs. - 5
Flush with hot water
Boil water separately and slowly pour it into the drain or run a hot-water cycle to flush remaining debris. A light baking soda flush between hot-water pours can help soften buildup.
Tip: Do not mix baking soda with vinegar inside the dishwasher; skip harsh chemical cleaners. - 6
Test the drain
Replace all components, restore power, and run a short cycle to test drainage. Watch for complete drainage without backup or unusual sounds.
Tip: If water remains after the test, revisit the trap and hose or call a pro.
People Also Ask
What causes dishwasher drains to clog?
Most clogs come from accumulated food particles, grease, and soap scum in the filter and trap. Over time these can form a stubborn blockage that slows drainage. Regular cleaning helps prevent these buildups.
Clogs usually form from food and grease in the filter and trap, which build up over time. Regular cleaning can prevent this.
Can I use chemical drain cleaners in a dishwasher?
No. Chemical drain cleaners can damage hoses, gaskets, and the pump, and may release harmful fumes. Mechanical cleaning (manual removal and flushing) is safer for dishwashers.
No, chemical drain cleaners can damage your dishwasher. Use manual cleaning and flushing instead.
How often should I clean the dishwasher drain?
Aim for a routine check every 1-3 months depending on usage and whether you notice slow draining or odors. Regular maintenance reduces the likelihood of major clogs.
Clean the drain every 1-3 months if you use it often, or sooner if you notice slow draining.
Is it safe to run the dishwasher after cleaning?
Yes. Run a quick hot-water cycle to flush the lines and ensure smooth drainage. If you smell odors, recheck the filter and trap for any remaining debris.
Yes, run a quick hot-water cycle to flush the lines after cleaning.
What tools help reach the drain trap?
A screwdriver or pliers to loosen fittings, a brush for scrubbing, and a flashlight to inspect hard-to-see areas work well for most traps.
A screwdriver or pliers, a brush, and a flashlight are usually enough to reach the trap.
Why does standing water return after cleaning?
This usually means there’s a hidden clog deeper in the line or a kinked hose. Reinspect the trap and hose, and consider professional diagnosis if the problem persists.
If water keeps returning, there’s likely a deeper clog or kink; recheck or consult a pro.
Watch Video
What to Remember
- Prioritize safety: unplug and power off before work.
- Clean the filter and trap to remove debris and restore flow.
- Avoid chemical drain cleaners in dishwashers to prevent damage.
- Flush with hot water and test drainage after reassembly.
- Call a professional if drainage problems persist.