How to Clean a Clogged Dishwasher: A Step-by-Step Guide
Learn how to clean a clogged dishwasher with a complete, safety-focused step-by-step process. Clear filters, inspect spray arms and hoses, use safe cleaning methods, and implement maintenance to prevent future clogs.

By following this guide, you will learn a safe, effective method to clean a clogged dishwasher. You’ll inspect the filter, spray arms, and drainage, clear any debris, and restore proper flow. Gather basic tools, unplug the unit, and run a test wash to confirm drainage. This approach reduces odor, prevents repeat clogs, and extends your appliance’s life.
Why Dishwashers Clog: Common Causes and Clues
When a dishwasher won''t drain or leaves dishes wet, the problem is often a clog that starts with the basics: a dirty filter, blocked spray arms, or a kinked drain hose. Hard water buildup can compound the issue by leaving mineral deposits on the filter and inside the spray arms, gradually reducing water flow. According to Dishwasher Tips, routine maintenance is the best defense: clean the filter monthly, check spray arms, and inspect hoses for kinks. By recognizing the typical culprits—food particles, grease, and mineral scale—you can tailor your cleanup to the source. This section helps you diagnose whether the clog is local (filter or arm) or systemic (drain path) so you select the right remedy rather than performing unnecessary scrubbing. Remember, the goal is a steady, clog-free drain that returns your dishwasher to peak performance.
Safety First: Preparation and Precautions
Safety should come before you begin any cleaning task on an appliance. Start by unplugging the machine and turning off the water supply to avoid electrical or plumbing hazards. Remove any standing water with a towel or sponge to prevent overflow when you open the door or remove components. Gather all needed tools in one place to minimize interruptions. This preparation reduces risk and helps you work methodically, increasing the likelihood of a successful unclog without damaging seals or components. If you use cleaners, read labels and avoid mixing products that could create dangerous fumes. A steady plan and proper safety steps set the foundation for a thorough clean.
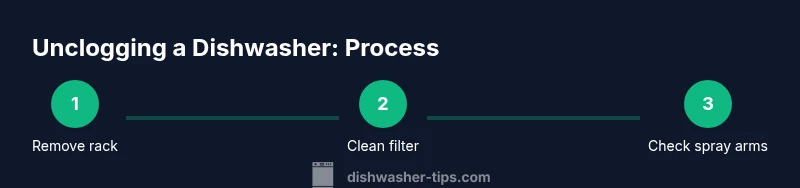
Clearing the Filter and Drain Path
The filter and drain path are the most common choke points. Remove the bottom rack to access the filter assembly, then pull out the filter and clean it under warm running water with a soft brush. Rinse thoroughly to remove all food particles. With the filter removed, inspect the drain opening for any debris and use a plastic tool or your fingers to clear away buildup. Reassemble the filter, making sure it seats securely. A clean filter restores proper suction, improves drainage, and can dramatically reduce odors caused by trapped food waste. If you still notice standing water after these steps, move to the next sections that address secondary paths.
Cleaning Spray Arms and Checking for Blockages
Spray arms distribute water to clean dishes; if they are clogged, water won’t reach all areas of the dishwasher. Remove each spray arm and rinse under running water. Use a toothpick or small brush to clear any sediment from the nozzle holes—avoid metal objects that could scratch or deform the arm. Reattach the arms and turn on a short cycle to confirm even spray. Blockages here are a frequent culprit in not-cleaning-dishes scenarios, so this check is essential for restoring performance.
Inspecting the Drain Hose and Disposal Path
If the drain hose is kinked or clogged, water may back up into the dishwasher. Locate the hose at the back of the machine and inspect it for kinks or clogs. Detach one end if needed and flush with water to clear obstructions. If the hose seems damaged or is difficult to detach, consider replacing it rather than attempting a risky repair. The drain path should be smooth and free of obstructions to ensure consistent drainage and prevent reoccurrence of clogs.
Using Cleaning Agents: Vinegar, Baking Soda, and When Not to Use Them
A gentle cleaning cycle can help dissolve mineral buildup without harsh chemicals. Run an empty cycle with a cup of white vinegar placed in a dishwasher-safe container on the top rack. After the vinegar cycle, sprinkle baking soda on the bottom and run a short wash to deodorize and lift residue. Do not mix bleach with other cleaners or use products that could corrode seals. Vinegar is effective for mineral buildup but should be used sparingly and not as a substitute for mechanical cleaning of filters, hoses, and spray arms.
Final Rinse, Reassembly, and Test Run
Reinsert all components securely and run a thorough test cycle with dishes to verify drainage and cleaning performance. Watch for standing water and listen for unusual noises—these can indicate other issues like a failing pump. If the dishwasher completes a cycle with no overflow and dishes come out clean, you have successfully restored function. Document any persistent issues for future reference or professional help.
Maintenance to Prevent Future Clogs
Prevention is easier than repair. Clean the filter monthly, inspect spray arms every few weeks, and run a cleaning cycle quarterly, especially in areas with hard water. Use a rinse aid to improve water flow and drying, and avoid loading large or hard items that could break the spray arms or filter. Install a whole-home water softener if your water is very hard, which reduces mineral buildup inside the appliance. Regular maintenance reduces the chance of clogs and extends the life of your dishwasher.
Troubleshooting If Problems Persist
If, after cleaning, your dishwasher still struggles to drain or leaves residue, the issue may require more advanced diagnostics. Possible causes include a faulty pump, a broken valve, or an electrical control problem. Check for error codes on newer models and consult your appliance manual. If the pump seems weak or nonfunctional, or if you notice persistent leaks, contact a qualified technician. Persistent problems after a thorough home cleaning suggest a professional assessment is the safest route to protect your investment.
Tools & Materials
- Sponge or microfiber cloth(For soaking and wiping components)
- Plastic brush or soft nylon brush(To scrub filter and spray arms without scratching)
- Toothpicks or dental picks(Clear small nozzle holes in spray arms)
- Bucket or tray(Collect wastewater during disassembly)
- Gloves(Protect hands from sharp edges and germs)
- Old towels or rags(Contain spills and drying)
- Vinegar (5% acidity)(Used for a gentle clean cycle)
- Baking soda(Deodorize and lift residues)
- Drain hose pliers or adjustable wrench(If hose needs detaching for inspection)
Steps
Estimated time: 45-75 minutes
- 1
Unplug and Power Down
Unplug the dishwasher from the outlet and turn off the circuit if you have access to the panel. This protects you from electric shock while you work. Gather towels and a bucket before you begin.
Tip: Keep a dedicated area with your tools within reach so you don’t lose track of anything. - 2
Access the Filter and Remove Debris
Open the door, remove the lower rack, and locate the filter assembly at the bottom. Take out the filter and rinse under warm running water. Use a soft brush to remove stuck particles.
Tip: Check for torn or missing seals as you clean; a damaged seal can cause leaks later. - 3
Clean Spray Arms
Detach spray arms if your model allows it and rinse holes with warm water. Use a toothpick to clear any clogs in the nozzle holes. Reattach the arms securely.
Tip: Avoid using metal tools that could bend or scratch the arms. - 4
Inspect the Drain Path and Hose
Trace the drain hose from the dishwasher to the sink connection. Look for kinks or clogs and detach a section if needed to flush it with water. Reconnect firmly to prevent leaks.
Tip: Run a quick water test to ensure the hose carries water away efficiently. - 5
Treat with Safe Cleaning Agents
Place a dishwasher-safe cup with white vinegar on the top rack and run an empty hot cycle. Then sprinkle baking soda on the bottom and run a short cycle to deodorize.
Tip: Do not mix vinegar with bleach or ammonia—this can produce dangerous fumes. - 6
Final Rinse and Reassembly
Reinsert the filter and verify all parts are seated properly. Run a full cycle with dishes to confirm drainage and cleaning are functioning. Wipe any moisture from seals to prevent mildew.
Tip: Keep a log of maintenance tasks for easier future reference. - 7
Test Run and Evaluate
After the test, check for proper drainage, water flow, and cleaning performance. If issues persist, consider professional diagnostics rather than continuing DIY fixes.
Tip: Document any error codes or symptoms to share with a technician. - 8
Long-Term Prevention
Establish a preventive routine: clean the filter monthly, use rinse aid, avoid hard items, and consider water softening if mineral buildup is heavy. Regular checks reduce future clogs.
Tip: Set calendar reminders to perform quarterly cleanings.
People Also Ask
What should I do first when my dishwasher is clogged?
Start by unplugging the dishwasher and turning off the water supply. Remove standing water and inspect the filter for debris. This quick triage helps pinpoint the blockage.
First unplug the unit, turn off water, and clear standing water before checking the filter for debris.
Can vinegar damage the dishwasher seals?
Vinegar is generally safe for occasional cleaning, but avoid high concentrations and never mix with bleach. Use vinegar sparingly and primarily for cleaning cycles, not continuous use.
Vinegar is okay in small amounts for cleaning, but don’t mix with bleach and don’t overuse it.
Why is water still not draining after cleaning the filter and hoses?
The issue may be a faulty pump, a collapsed hose, or an air gap (in some models). Check the pump for obstructions, inspect the hose for kinks, and confirm the air gap is clear if your model has one.
If drainage remains, it could be a pump or hose problem; inspect these parts and check for an air gap if present.
How often should the dishwasher filter be cleaned?
Check and clean the filter monthly or whenever there is noticeable drainage or odor. Regular cleaning keeps clogs from forming.
Clean the filter about once a month or when you notice drainage problems.
Is it safe to call a professional for a clogged dishwasher?
Yes. If basic cleaning doesn’t restore drainage, a professional can diagnose pump failures, wiring issues, or complex clogs. Prioritize safety and equipment integrity.
If cleaning doesn’t fix it, it’s wise to call a professional to check the pump or control system.
What maintenance helps prevent future clogs?
Regularly clean the filter, check spray arms, use a rinse aid, and avoid loading hard items that can block passages. Consider water softening if mineral buildup is persistent.
Keep up with routine filter cleaning and arm checks to prevent future clogs.
Watch Video
What to Remember
- Inspect and clean the filter to restore drainage
- Clear spray arms for proper water flow
- Check the drain hose path to prevent backflow
- Use safe cleaning cycles to reduce mineral buildup
- Establish a maintenance routine to prevent future clogs