How to Clear a Dishwasher Drain
Learn a practical, step-by-step approach to clearing a dishwasher drain, preventing clogs, and restoring proper drainage. This guide covers safety, tools, and maintenance to keep your dishwasher running smoothly.

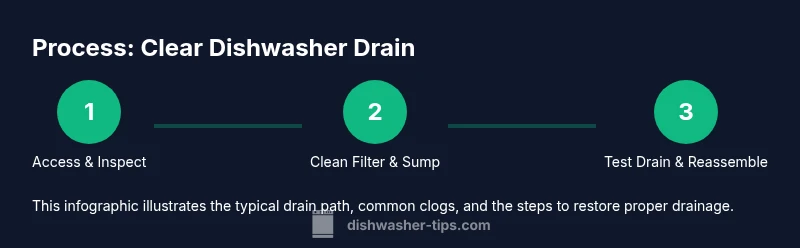
Goal: clear a dishwasher drain by removing debris and restoring proper flow. Start by unplugging the machine, pulling the lower rack, and inspecting the drain filter. Clean the filter, clear the inlet hose, and flush with hot water before running a short cycle to verify drainage. If the flow remains blocked, avoid forceful tools and seek professional help.
How a dishwasher drain works
Dishwashers remove used water through a closed path that starts in the tub, moves into a small sump, passes through a filter, and is expelled by the drain pump into the drain hose. If any part of this path becomes blocked or dislodged, water can pool in the bottom or back up into the dishwasher. According to Dishwasher Tips, understanding these components helps you pinpoint where a clog forms. The Dishwasher Tips team found that most drainage issues arise when the filter or sump is blocked, or when a hose becomes kinked. This knowledge helps you target the right area without tearing the machine apart unnecessarily.
Key components to know include the drain filter, sump, drain pump, drain hose, and sometimes an air gap. Each part has a specific job: the filter traps debris, the sump collects water, the pump moves water toward the drain, and the hose carries it away. A clogged filter can back up water into the tub, while a kinked hose can restrict flow. Regular inspection keeps these parts clear and functioning.
Common causes of drainage problems
Most drainage problems begin with debris and improper disposal. Food scraps, starches, and mineral deposits can collect in the filter, sump, or on the impeller of the drain pump, creating partial or complete blockages. Dishwasher Tips analysis shows that the filter and sump are common choke points, especially in older models where buildup has had years to accumulate. Other causes include a kinked or disconnected drain hose, an obstructed air gap, or a failed drain pump. A clogged air gap can prevent air from equalizing pressure, which slows drainage. If you notice standing water after a cycle, inspect along the entire drain path.
Proactively cleaning the filter and sump reduces recurring clogs. Inspect hoses for cracks or bulges that can trap debris. If you notice unusual noises from the pump or inconsistent drainage, these are red flags that warrant closer inspection.
Safety first: prepare your workspace
Safety is non-negotiable when working with electrical appliances near water. Unplug the dishwasher from the outlet and switch off the circuit breaker serving the kitchen. If the unit is hard-wired, consult a qualified electrician before opening service panels. Allow the appliance to cool, then put down towels to catch any spills. Remove the lower rack to gain access to the drain area and filters. Keep children and pets away during the procedure. According to Dishwasher Tips, taking these precautions reduces the risk of electric shock and water damage. A well-lit workspace helps you spot tiny clogs in hard-to-reach corners.
If you sense a gas line or any unusual smell, leave the area and contact a professional immediately. Use dry hands and wear protective gloves; never work with wet hands near live electrical components.
Gather the right tools and materials
Before you begin, assemble a basic kit to minimize interruptions. A large bucket catches dirty water; old towels mop up spills; a flashlight helps you see inside dark compartments; pliers and a screwdriver help detach clamps or panels; a drain snake clears deeper blockages; a brush keeps filters and sump clean; and a few paper towels for quick cleanup. Keep a plastic bag handy to dispose of debris. Avoid harsh chemicals that could damage seals or react with metal components.
The kit should be accessible near the sink for convenience. If you don’t have a drain snake, a flexible auger or a long-handled brush can work in a pinch. Always start with mechanical cleaning before considering aggressive cleaners; they can harm gaskets and seals.
Accessing the drain: what's behind the front panel
Gaining access to the drain path often requires removing the lower kick plate or access panel. Use a screwdriver to remove screws, then gently swing the panel away to reveal the drain hose, filter, and sump. Inspect for obvious blockages and wipe away any pooled water. If the filter is removable, take it out and set it aside for cleaning. This step is essential because many clogs originate in the visible, user-serviceable parts.
Take photos as you go so you can reassemble correctly. If you encounter screws that resist, apply a small amount of penetrating oil and wait a minute before trying again. Avoid forcing components, as this can strip screws or damage mounts.
Cleaning the filter and sump: how to scrub debris
The drain filter traps food particles and prevents them from entering the pump. Remove the filter and rinse it under warm running water. Use a soft brush or old toothbrush to scrub away stubborn residue from the filter housing and sump, then wipe with a clean cloth. Reassemble after the parts are dry. This cleanup restores proper water flow and reduces the chance of future clogs. Dishwasher Tips emphasizes cleaning the filter monthly in households with heavy usage to maintain efficiency.
Tip: Do not use harsh chemicals on aluminum or plastic components as they can degrade seals over time. A mild degreasing cleaner or warm water with a touch of dish soap is usually sufficient.
Inspecting hoses, clamps, and air gap
Trace the drain hose from the sump to where it exits under the sink or back of the unit. Look for kinks, folds, or leaks that could trap debris. Check hose clamps for tightness and signs of wear. If your system includes an air gap, remove the cap and ensure it is clear of obstructions. Any blockage here can halt drainage entirely. A flashlight helps you see through dark hoses and joints.
Replace any damaged hoses or seals promptly. After inspection, wipe down the exterior areas to remove any grease that could attract more debris. This inspection helps isolate whether the clog is in the hose, pipe, or sump area.
When a clog goes deeper: using a drain snake safely
For deeper clogs in the drain line, a drain snake (drain auger) can reach past the filter and sump. Insert the snake gently and rotate to dislodge the blockage. Do not force the snake deeper than the elbow of the hose, as this can push debris into the pump or cause damage. Turn off the machine and unplug while operating the snake, and wear safety glasses to protect your eyes from splashes.
If you encounter resistance or can’t retrieve material, stop and reassess. For stubborn clogs, consider professional service. Using a drain snake incorrectly can damage components or push clog material into the pump.
Reassembly, run test, and verify drainage
Reassemble the drain components and lower rack. Plug the unit back in and run a short, empty cycle to observe drainage behavior. Listen for the pump running smoothly and watch for any signs of leaks or unusual noise. If the water drains cleanly without backing up, the clog is cleared. If you still see standing water, repeat targeted steps on the filter and hose, or move to a professional diagnostic. The key is to validate proper drainage with a test cycle and monitor for a full minute after completion.
After testing, wipe all surfaces dry and store tools properly. Keeping the area clean reduces future build-up and helps you notice issues early.
Maintenance tips to prevent future clogs
Preventive maintenance is easier than repeated clogs. Clean the filter regularly, ideally every month, and rinse the sump with warm water. Avoid washing large debris down the disposal that could migrate into the dishwasher drain. Use a mesh sink strainer to catch food scraps before they enter the dishwasher. Run hot water through the sink before starting a cycle to ensure a clear path for drainage. Periodically inspect hoses for cracks and replace them as needed. A small investment in routine maintenance pays off with fewer service calls and longer appliance life. The Dishwasher Tips team recommends setting a monthly reminder to inspect and clean the drain components to maintain optimal performance.
Tools & Materials
- Large bucket(To collect dirty water)
- Old towels or rags(For spills and wiping surfaces)
- Flashlight(To illuminate dark drain areas)
- Pliers(For clamps and hose fittings)
- Screwdriver set (Phillips & flat-head)(To remove access panels)
- Drain snake / auger(Clear deeper clogs in drain line)
- Drain cleaning brush / pipe brush(Scrub filter and sump)
- Plastic gloves(Protect hands during cleaning)
- Paper towels(Clean up debris and spills)
- Mild degreasing cleaner or dish soap(For cleaning greasy residue)
Steps
Estimated time: 30-60 minutes
- 1
Power down and access the drain area
Unplug the dishwasher and switch off the circuit breaker. If accessible, remove the lower kick plate to reveal the drain area. Inspect for obvious clogs and take note of any loose hoses or fittings. Keep towels handy for any spills and ensure the area is well-lit so you can see all components clearly.
Tip: Verify the unit is fully disconnected from power before touching any internal parts. - 2
Remove the drain filter and inspect
Take out the filter assembly and rinse it under warm water. Use a brush to scrub away trapped food and mineral residue. Wipe the filter housing with a damp cloth to remove stuck debris. Return the filter only after it dries completely.
Tip: Hold the filter over a bucket to catch any loose debris and avoid dropping it. - 3
Inspect the sump and surrounding area
Look into the sump for any visible clogs or trapped particles. Remove any loose debris with fingers or a brush. Check for leaks around seals and clamps, tightening where appropriate. Ensure the sump area is dry before reassembly.
Tip: Take care not to disturb the pump impeller; a damaged impeller can cause poor drainage. - 4
Clear the drain hose and connections
Trace the hose from the sump to its exit. Detach clamps carefully and inspect for kinks or cracks. If you find a blockage, attempt to push it out with your gloved finger or a brush. Reconnect hoses and ensure clamps are tight.
Tip: Never force a blockage through the hose; a kinked hose can cause backflow and more issues. - 5
Use a drain snake for deeper clogs
Gently insert the snake into the drain line and rotate to dislodge the blockage. Stop if you feel resistance and back out slowly. Remove any material the snake collects and flush the line with warm water.
Tip: Operate the snake slowly and wear safety glasses to protect eyes from splashes. - 6
Test drainage and reassemble
Reinstall all components, plug in the dishwasher, and run a short cycle without dishes. Observe drainage and inspect for leaks. If water drains normally, you’ve completed the fix; if not, consider professional diagnostics.
Tip: Keep a close eye on the first full cycle after reassembly to confirm stability.
People Also Ask
Why isn't my dishwasher draining after I've cleaned the filter?
If drainage remains slow or blocked after cleaning the filter, the clog may be in the sump, hose, or a deeper section of the drain line. Recheck the hose connections for kinks and test again. If the issue persists, you may have a pump problem or a more stubborn clog that requires professional assistance.
If cleaning the filter doesn't fix it, there might be a deeper clog or pump issue; recheck hoses and consider calling a professional.
Can I use chemical drain cleaners in a dishwasher?
Chemical drain cleaners are not recommended for dishwashers because they can corrode hoses and seals and may damage plastic components. Use mechanical cleaning methods first, and consult your manual or a professional before trying any chemicals.
No—avoid chemical drain cleaners in dishwashers; they can cause damage. Use mechanical cleaning methods first.
How often should I clean the dishwasher drain and filter?
Aim to inspect and clean the filter and sump at least once a month, especially if you notice slower drainage or more food debris. Regular maintenance reduces the frequency of major clogs and helps your dishwasher run efficiently.
Clean the filter and sump monthly to keep drainage smooth.
What should I do if water remains after a test run?
If water remains, repeat the cleaning process focusing on the filter and hose, then run another test cycle. If the problem persists, there may be a pump failure or a blockage beyond your reach; contact a professional.
If water stays after testing, try cleaning again and consider professional help if it doesn’t improve.
When should I call a professional for drainage problems?
Call a professional if you cannot locate or remove a clog, notice recurring leaks, or hear unusual pump noises after attempting standard cleaning. Professional service can avoid further damage and ensure correct diagnosis.
If in doubt after trying standard steps, a professional can diagnose and fix deeper issues.
What to Remember
- Clear the drain path from filter to pump to restore flow
- Inspect and clean the filter and sump regularly
- Use a drain snake only if you are comfortable and safe
- Avoid chemical drain cleaners in dishwashers
- Prevent clogs with routine maintenance and proper loading