Troubleshooting Dishwasher Heating Element Not Working
Learn fast, safe steps to diagnose and fix a dishwasher heating element not working. This guide covers common causes, testing methods, and when to replace.

The most common cause of a dishwasher not heating is a power issue or a failed heating element. Start by confirming the unit has power—check the outlet, circuit breaker, and door latch. If power is present, test the heating element with a multimeter for continuity. No continuity usually means the element has failed and should be replaced.
What is a dishwasher heating element and why it fails
The heating element in most dishwashers is a simple coil submerged in water or located at the bottom of the tub. Its job is to bring water up to the proper washing temperature so detergents work effectively. When the dishwasher heating element not working, you often notice longer wash times, dishes that come out damp or cold, and occasional error codes on the control panel. Common failure modes include an open circuit (broken coil), a burned-out fuse in the heater, or a faulty connection. Environmental factors like mineral buildup from hard water or exposure to corrosive detergents can also shorten its life. Understanding these failure modes helps you decide whether to replace the element, repair wiring, or call a pro. In many homes, this is the most time-intensive failure to fix, but with the right steps you can often confirm the problem and plan the right repair.
Common signs of a failing heating element
If the water never heats above room temperature, cycles take longer, or dishes remain wet after a cycle, the heating element may be failing. You might see error codes related to high-limit temperature or a heater fault. In some models, the rinse cycle won't reach heat, or the interior may have a mineral crust around the element. Keep in mind other components like the thermostat or control board can mimic heating problems. If you notice unusual odor during a cycle or see steam escaping from the bottom of the appliance, treat it as a sign something is wrong and inspect connections carefully once the power is off.
Safer initial checks you can perform
Before you reach inside the dishwasher, unplug the unit and switch off the circuit breaker. Check the power outlet for signs of wear, reset GFCI outlets, and verify the door latch engages properly. Ensure the rinse aid and soap dispenser aren’t leaking onto electrical contacts. Wear safety gloves and eye protection when removing panels, and never work near live wires. If you have access to a spare outlet or a different circuit in your home, you can temporarily test the machine on a separate circuit to rule out supply issues. These checks are quick and often reveal simple causes that don’t involve touching the heating element itself.
How to test the heating element with a multimeter
Testing requires power off. Remove the access panel, disconnect the heating element leads, and touch the multimeter probes to the terminals to check continuity. A closed loop indicates continuity (element likely good); an open circuit means the element has failed. If you see corrosion on the terminals, clean them and retest. Never test while the element is connected to power. If your meter shows intermittent readings, inspect the wiring harness for loose connections and damaged insulation. After you confirm a fault, plan for replacement with the correct part number.
When to replace vs repair and how to source parts
If the element shows no continuity or obvious physical damage, replacement is usually the most reliable fix. Check the model number and order the correct heating element from a reputable supplier. Compare prices and shipping times across several vendors before committing, but avoid very cheap parts that may be low quality. If you’re comfortable with basic electrical work, you can replace the element yourself by following the service manual for your model. Otherwise, hire a certified appliance technician. Reputable repair shops will also test the thermostat and control board while they’re at it to prevent a second failure soon after replacement.
Maintenance tips to extend the life of your heating element
Regular descaling with a dishwasher-safe cleaner helps reduce mineral buildup on the heating element. Use the recommended detergent and avoid harsh acidic cleaners that can corrode metal. Run hot cycles regularly and inspect wiring connections for signs of wear. Keep the sump area clean and wipe away any mineral deposits around the element as part of routine maintenance. Finally, consider installing a water conditioner if mineral buildup is persistent in your area, which will prolong the life of heating components across multiple appliances.
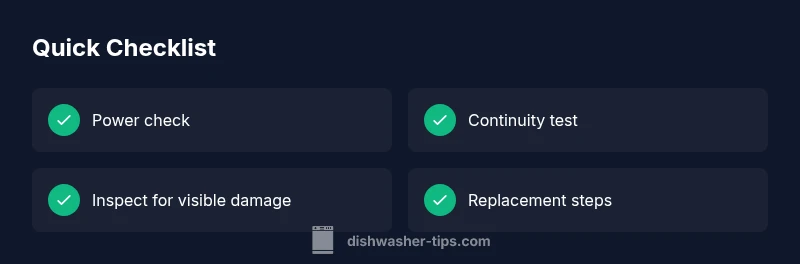
Steps
Estimated time: 60-120 minutes
- 1
Power down safely
Unplug the dishwasher or switch off at the circuit panel. This prevents electric shock while you work.
Tip: Double-check the source with a non-contact tester before touching wires. - 2
Check the basics
Inspect the power outlet, GFCI status, and the door latch. A tripped outlet or a faulty door switch will stop heat.
Tip: Reset tripped outlets and ensure the door latch clicks firmly. - 3
Access the heating element
Remove the lower access panel or toe-kick panel to reach the element. Photograph wire connections before disconnecting.
Tip: Label wires for easy reassembly. - 4
Test for continuity
With the unit unplugged, disconnect the heating element leads and touch the multimeter probes to the terminals. A closed loop means continuity; open indicates failure.
Tip: If you see arcing or burnt insulation, the element is damaged. - 5
Inspect for visible damage
Look for burnt coils, blistered insulation, or corroded terminals. Visual signs often accompany a failed element.
Tip: Clean corrosion from terminations with a dry brush before re-testing. - 6
Decide on replacement
If continuity is absent or you see obvious damage, plan a replacement with the correct part number.
Tip: Keep the model number handy to order the right heating element. - 7
Reassemble and test
Reconnect wires, replace panels, restore power, and run a test cycle to verify heating.
Tip: Observe for unusual smells or smoke—if any, power off immediately.
Diagnosis: Dishwasher won't heat water or reach expected wash temperature
Possible Causes
- highPower supply issue (outlet, circuit breaker, door switch)
- highBurned or open heating element
- mediumFaulty control board or solid-state relay
- mediumThermal fuse blown
Fixes
- easyInspect outlet, test socket, and reset or replace circuit breaker if needed
- mediumTest heating element for continuity with a multimeter; replace if open
- hardReplace heating element assembly; follow model-specific service manual
- hardTest control board or relay and replace if failing
People Also Ask
How can I tell if the heating element is burned out?
Look for visible damage and test continuity with a multimeter. No continuity usually means the coil is broken. If you see scorching or burning odors, replace immediately.
If you suspect a burned heater, check continuity with a meter; replace if there’s no continuity or visible damage.
Can a faulty thermostat cause heating problems?
Yes. A faulty thermostat or high-limit switch can prevent heating even if the element is fine. Test or replace the thermostat if the heater passes continuity tests but water never reaches target temperature.
A bad thermostat can stop heating even with a good element; test and replace as needed.
Is it safe to test the heating element with a multimeter?
Testing is safe if you unplug the unit and discharge capacitors where applicable. Follow the manufacturer's procedure and avoid touching live components.
Yes, when unplugged, you can test continuity with a meter following the manual.
How long does a heating element replacement take?
Most replacements take 60-90 minutes for a trained DIYer, depending on your model and access. Expect additional time for part ordering if not in stock.
It usually takes about an hour to replace the element if you have the part on hand.
Should I call a professional?
If you’re uncomfortable with electrical work, or your unit is under warranty, contact a certified appliance technician. They can verify the element, thermostat, and control board without risk.
If in doubt, call a pro to handle heating-element diagnostics and replacement.
Will replacing the heating element void my warranty?
Replacing components yourself may affect warranty coverage. Check the manual or contact the manufacturer for guidance before proceeding.
Check your warranty terms before attempting replacement.
Watch Video
What to Remember
- Check power first before touching heating parts
- Test continuity to confirm element health
- Replace if open or damaged, don’t improvise
- Professional help when in doubt or if warranty applies