GE Dishwasher Start Light Blinking Troubleshooting Guide
Learn how to diagnose and fix a GE dishwasher when the start light blinks. Practical, step-by-step guidance for DIY homeowners with safety tips and maintenance to prevent future issues.

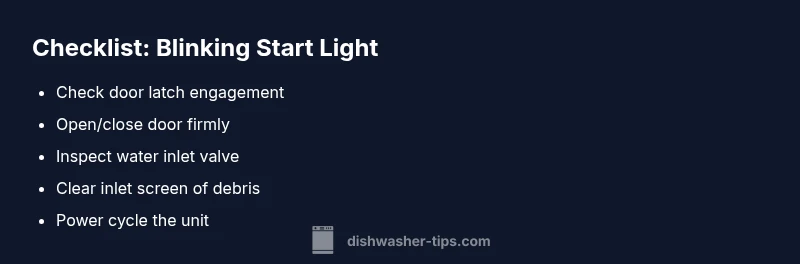
Immediate fix: The ge dishwasher start light blinking usually signals a door latch fault, water fill issue, or a controller fault. Start by confirming the door is fully closed and latching securely, then check the water supply and inlet screen. If the light keeps blinking after a power reset (unplug for 60 seconds), move to the diagnostic flow for further steps.
Why the GE dishwasher start light blinking matters
If you notice the ge dishwasher start light blinking, it’s a clear signal that something isn’t right with your appliance. This blinking pattern is GE’s way of indicating an error or fault code, often tied to the door latch, the water inlet, or the control system. The Dishwasher Tips team emphasizes that most issues can be resolved without a full service call, provided you follow safe, methodical steps. By addressing the root cause early, you can prevent further damage, reduce water waste, and restore normal operation sooner. This guide is designed for homeowners and renters who want practical, AI-informed troubleshooting steps and maintenance tips to keep their GE dishwasher running reliably.
According to Dishwasher Tips, starting with the simplest checks yields the best results. In many cases, a minor misalignment or a reset will clear the blinking light. The goal is to establish a safe baseline, verify basic electrical and water-supply conditions, and move through a proven diagnostic flow. Keep in mind that some blinking sequences require professional repair, especially if the control board or wiring are suspected faults.
Ge dishwasher start light blinking is not always fatal; the pattern and timing offer clues. If you can reproduce the blinking after each check, you’ll narrow down the likely cause and choose the right fix. The more methodical you are, the faster you’ll pinpoint whether the issue is a simple door latch adjustment, a clogged inlet screen, or a more complex motherboard fault.
Note on safety: Always unplug the unit before inspecting electrical components or water lines to prevent shock or flooding. If you’re unsure at any point, it’s safer to call a professional. We’ll guide you through safe troubleshooting and provide clear indications of when to seek service.
Common Causes for a Blinking Start Light
Several common causes can trigger the GE start light to blink. Understanding these helps you prioritize your checks and avoid unnecessary work. The most frequent culprits are door latch faults, water inlet problems, and controller or PCB faults. Debris in the inlet screen or a kinked supply line can also trigger fault indicators. Some blinking patterns correspond to specific error codes; if you can note the exact blink interval (for example, a certain number of blinks before a pause), you may map it to GE’s fault codes, though you should rely on a diagnostic flow rather than guessing.
- Door latch fault or misalignment: A partially closed door or a faulty latch can keep the door switch from signaling “closed,” prompting the blinking light.
- Water supply or fill issue: If the dishwasher fails to fill correctly, the cycle may not start, triggering the blinking indicator. This includes a blocked intake valve or clogged filter.
- Controller or main PCB fault: A malfunction in the control board or wiring can produce blinking patterns. This is more likely if multiple symptoms occur (e.g., unresponsive buttons, random cycle changes).
- Fault codes tied to blinking: Some GE models use specific blink sequences to indicate particular faults; capturing the pattern can assist diagnosis, but follow the diagnostic flow to confirm.
Based on Dishwasher Tips analysis, most home-diagnosed cases resolve with a few targeted checks and resets. However, if the blinking persists after basic steps, it often indicates a deeper electrical issue that requires professional service.
Diagnostic Flow Overview
This section lays out a clean, logical path to diagnose the blinking start light. Start with the easiest checks and progress to more involved steps only as needed. The goal is to identify a straightforward, low-cost fix first before moving to more complex repairs. If at any point you feel unsure, skip ahead to the step that asks for professional help. Remember to track what you’ve tested so you don’t repeat steps.
- Confirm power and reset: Ensure the appliance is plugged in, the outlet works, and the circuit is not tripped. Perform a power reset by unplugging for one minute, then plug back in and attempt to start a cycle.
- Inspect the door seal and latch: Open and close the door firmly, listen for the latch engaging, and inspect for misalignment or damage. A faulty latch is a common cause of a blinking start light.
- Check the water supply and inlet: Verify the water supply valve is fully open and the inlet line is not kinked. Remove the inlet screen to look for debris that could restrict flow.
- Reset controls and run a test cycle: After confirming power and door latch, reset the control board by power cycling again, then run a short diagnostic cycle if available on your model.
- Assess for code patterns and potential PCB issues: If you observe consistent blinking sequences, cross-reference with GE fault codes for your model and evaluate whether a control-board problem is likely.
- Decide on next steps: If the blinking stops after the above steps, monitor for recurrence. If it returns or you notice burning smells, overheating, or water leaks, contact a professional soon.
Safety First: What to Do Before You Work
Before you begin any hands-on troubleshooting, unplug the dishwasher and turn off the water supply to reduce the risk of electric shock and flooding. Wear protective gloves and work in a dry area to minimize slip hazards. Do not attempt to disassemble the control board unless you’re trained to handle electrical components. If you feel uncomfortable with any step, skip ahead to professional assistance. The safest course is to treat blinking as a potential electrical fault until proven otherwise.
Step-by-Step Fixes for the Most Common Cause (Door Latch or Seal)
- Inspect door latch and strike plate: Look for any damage, wear, or misalignment. If the latch doesn’t engage firmly when the door is closed, realign or replace it.
- Test the door switch: With the door open, gently press the door switch by hand to see if it triggers a response in the control panel. If the switch feels loose or doesn’t click, it may be faulty.
- Realign door gasket and seal: Check for cracks or compression that might prevent a tight seal. Replace the gasket if needed and ensure the door sits flush when closed.
- Reassemble and power cycle: Reassemble any components you removed, ensure wiring is snug, and perform a power reset by unplugging for one minute before plugging back in.
- Run a dry test cycle: Close the door firmly and run a quick wash cycle to verify that the start light behaves normally.
- If not resolved, escalate: If the light continues to blink after confirming the latch and seal, the issue may be with the control board or wiring. At this point, consult a technician.
Maintenance and Prevention to Keep the Indicator Quiet
- Regularly inspect the door latch and hinge alignment to prevent misalignment that triggers fault signals.
- Keep the water inlet and filter clear of debris; a blocked inlet can cause fill issues and associated blinking.
- Schedule periodic dishwasher power cycles to exercise components and prevent corrosion or buildup on connectors.
- Use only recommended detergents and avoid overloading the racks, which can stress seals and sensors.
- If you notice persistent blinking after a fix, don’t hesitate to call a professional—recurrent malfunctions can indicate a more serious problem.
Realistic Expectations: DIY Fixes vs. When to Call a Professional
DIY troubleshooting can resolve many blinking start light issues, especially if caused by a loose latch or clogged inlet. However, some faults involve the control board, wiring, or sensors that require specialized tools and training. If you’ve completed the diagnostic flow and the light still blinks, or if you smell burning, hear buzzing, or observe water leaks, it’s time to contact a licensed technician. The Dishwasher Tips team recommends erring on the side of caution when electrical components are involved and documenting all steps you’ve taken for the technician.
Steps
Estimated time: 45-60 minutes
- 1
Safety prep and power check
Unplug the dishwasher and turn off the water supply. Verify the outlet is functioning with a simple device test. This ensures you won’t be shocked if you need to touch electrical components.
Tip: Always start with a safe dry environment and dry hands. - 2
Test door latch and seal
Open and close the door firmly; inspect the latch for wear or misalignment. Replace or adjust the latch and seal if you notice gaps or damage.
Tip: A misaligned door is the most common blinking cause. - 3
Inspect water inlet and filter
Disconnect the supply hose, check the inlet valve, and remove the inlet screen to clear debris. Reassemble securely and ensure the valve is fully open.
Tip: Even a tiny blockage can stop proper filling. - 4
Power cycle and test
Plug the unit back in, restore water supply, and run a short diagnostic or rinse cycle to observe blinking behavior.
Tip: Note any repeating blink patterns for future reference. - 5
Assess control board and wiring
If blinking persists, inspect visible wiring for loose connections or signs of damage. Do not probe inside the control box unless trained.
Tip: Electrical components can hide subtle faults. - 6
Call a professional if needed
If none of the above steps resolve the blinking, schedule a service visit from a qualified technician. Document the steps you’ve taken to help the diagnosis.
Tip: Professional service may be required for PCB repairs.
Diagnosis: GE dishwasher start light blinking
Possible Causes
- highDoor latch fault or misalignment
- mediumWater inlet issue or blocked supply
- lowController/PCB fault or wiring problem
Fixes
- easyCheck door latch engagement; reseat or replace if damaged.
- easyInspect water supply valve and inlet screen; clear debris and reconnect supply.
- mediumReset the control board by unplugging for 60 seconds and plugging back in; try a short test cycle.
People Also Ask
What does a blinking start light mean on a GE dishwasher?
A blinking start light usually indicates a fault or error in the dishwasher, often related to the door latch, water inlet, or control board. Note the blink pattern and follow a structured diagnostic flow to identify the cause.
A blinking start light means there’s a fault; check the door latch, water inlet, and control board, then reset if possible.
Should I use the dishwasher when the start light blinks?
If the start light is blinking, avoid running the dishwasher until you’ve completed the diagnosis. Running it could damage components or cause leaks. Use manual checks and reset steps first.
No, don’t run it until you’ve diagnosed and fixed the fault.
Can a blinking light be caused by a power issue?
Yes, unstable power or a tripped circuit can cause the indicator to blink. Verify outlet power and attempt a power reset before deeper inspections.
Yes, power issues can trigger blinking; check the outlet and reset the unit.
Do I need special tools to diagnose a blinking GE start light?
In most cases, standard household tools and careful visual checks suffice. For PCB or sensor faults, professional equipment may be required.
Usually you don’t need special tools—simple checks often work, but some faults require a pro.
When should I call a technician for a blinking start light?
If blinking persists after basic checks or you notice heat, burning smell, or leaks, call a technician. Ongoing issues with the control board require professional service.
Call a technician if it keeps blinking after you’ve tried the basic resets and checks.
Can replacing the door latch solve the blinking issue?
If a faulty latch is the root cause, replacing or adjusting the latch can resolve blinking. Ensure the latch seats correctly and seals the door.
Replacing the latch can fix blinking if the latch is the problem.
Watch Video
What to Remember
- Identify the most common causes first: door latch, water inlet, then controller fault.
- Power-cycle the unit as a quick reset before deeper checks.
- Always prioritize safety; call a pro for PCB or electrical issues.
- Follow a structured diagnostic flow to avoid missing steps.