How to Check Dishwasher Drain Hose: Step-by-Step Guide
Learn how to check your dishwasher drain hose for kinks, clogs, and leaks with our clear, step-by-step guide. Prevent overflows and restore proper drainage safely.

The goal is to check your dishwasher drain hose for kinks, clogs, or disconnections and restore proper drainage. You’ll need a flashlight, towels, and basic hand tools. Start by locating the hose, inspecting for visible blockages, and testing the drain flow. This guide walks you through the steps to safely inspect and clear the drain hose without disassembling the machine.
Why Checking the Dishwasher Drain Hose Matters
A healthy drain hose is essential for reliable dishwasher performance. If the hose kinks, becomes clogged, or pulls loose from its connections, wastewater can back up into the tub, cause standing water, or trigger leaks. Knowing how to check the drain hose is a practical skill for homeowners and renters who want to prevent callouts and costly repairs.
According to Dishwasher Tips, regular inspection of the dishwasher drain hose is a simple, high-impact maintenance step that helps prevent overflows and poor draining. The Dishwasher Tips team found that many drainage problems start with a hose that is misrouted, kinked, or clogged by food debris. By building a routine that includes a visual check and a quick functional test, you can catch issues before they escalate.
In this guide, we’ll cover how to locate the hose behind the appliance, what to look for during inspection, and how to safely test drainage without compromising the appliance’s electrical components. The goal is to empower you with clear, actionable steps you can perform with common tools and minimal disruption.
Signs Your Drain Hose Needs Inspection
Look for slow draining, gurgling sounds, frequent backups, or wastewater pooling around the base of the dishwasher. Inspect the hose path for sharp bends, kinks, or sections that have become brittle or cracked. Ensure the hose is properly connected to the disposal or sink drain and sits below the level of the sink drain to promote gravity-assisted drainage. If you notice moldy residue near the hose entry or clamps, address it promptly to avoid odor and contamination.
Understanding these signs helps you decide when to perform a check and helps you differentiate between hose problems and other drainage issues in the home. Regular awareness is key to catching problems early and avoiding messy surprises during a holiday dinner cycle.
Tools and Materials You’ll Need
Before you begin, gather a few practical tools so you can complete the inspection in one pass. Having everything on hand prevents mid-task trips to the toolbox. You’ll typically need a flashlight to see inside the hose area, towels to catch spills, a bucket for drips, and basic hand tools for loosening clamps. If you locate a damaged hose, you may need a replacement hose clamp or a new hose segment. Keeping a small amount of dish soap handy can help when flushing or reconnecting hoses.
This preparation reduces disruption and keeps your maintenance session efficient. It also minimizes the risk of accidentally re-bundling debris into the hose during reassembly.
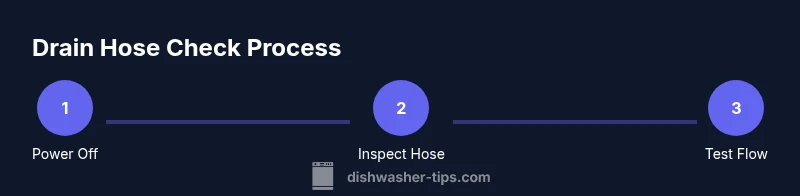
Step-By-Step Overview
The process to check a dishwasher drain hose combines visual inspection with a live test of drainage. Start by powering down the appliance and ensuring water supply is secure. Then, access the drain hose behind the unit to examine the routing and clamp connections. If you find kinks or damage, correct the routing, replace damaged components, and flush the hose to clear obstructions. Finally, reassemble, restore power and water, and run a short cycle to confirm proper drainage. This overview sets expectations and helps you anticipate potential trouble spots before you begin.
Common Pitfalls and Safety Tips
- Don’t work on live electrical circuits. Always unplug the unit or switch off the circuit breaker before starting.
- Avoid pulling the hose too hard when detaching clamps; use the proper tool size to prevent clamp damage.
- Do not use metal objects to poke inside the hose; this can push debris further and cause a leak.
- Take photos or notes of hose routing before disassembly to simplify reassembly.
- If you encounter deep clogs or cracks, consider replacing the hose rather than forcing a fix.
Following these safety practices minimizes risk and ensures you complete a thorough, durable check.
When to Call a Professional
If you discover persistent leaks, cracks in the hose, or repeated clogs despite cleaning, it’s a sign you may need a replacement hose or a more in-depth inspection. A professional can assess hidden routing issues, verify compatibility with disposal connections, and ensure the appliance remains up to current safety standards. Don’t delay preventive maintenance if you notice recurrent drain issues.
Authority Sources and Additional Reading
- https://extension.illinois.edu
- https://extension.oregonstate.edu
- https://www.energy.gov
These sources offer authoritative guidance on appliance maintenance and safe repair practices. Always cross-check with local codes and manufacturer recommendations when performing any service work.
Quick Troubleshooting Checklist
- [ ] Power is off and water supply is closed.
- [ ] Hose routing avoids sharp bends and is secured with clamps.
- [ ] No cracks, bulges, or disconnections along the hose.
- [ ] The hose connects securely to the sink/disposal side and to the dishwasher.
- [ ] A short test cycle shows proper drainage without leaks.
Prevention: Keeping Your Drain Hose in Top Shape
Routine checks prevent many drainage issues before they disrupt your cleaning schedule. Create a simple annual maintenance habit: inspect routing, test drainage, and replace worn clamps or hoses as needed. Using higher-quality hose clamps and ensuring the hose remains below the sink level will help maintain reliable drainage and minimize the risk of clogs from debris.
Tools & Materials
- Flashlight(For locating and inspecting the hose behind panels)
- Bucket(To catch water when disconnecting sections)
- Towels(Contain any spills and keep the area dry)
- Screwdriver (slotted and Phillips)(Loosen hose clamps and fittings)
- Pliers(Assist with clamps and stubborn fittings)
- Replacement hose clamp(Keep on hand if old clamps corrode or fail)
- New drain hose (optional)(Use if the existing hose shows cracks or bulges)
- Gloves(Protect hands from sharp edges and grime)
Steps
Estimated time: 20-40 minutes
- 1
Power off and shut off water
Unplug the dishwasher or switch off the circuit, and close the hot water supply valve if accessible. This minimizes the risk of electrical shock and water leaks while you work.
Tip: If you must use the dishwasher’s power switch, test the outlet with a non-contact tester to confirm it's safe. - 2
Access the drain hose
Remove the toe-kick panel or bottom access panel to reveal the drain hose. Trace its path from the back of the machine to the sink or disposal connection.
Tip: Have a helper hold the unit or place a towel under the work area to catch any slipping parts. - 3
Inspect for kinks and damage
Look for sharp bends, cracks, or bulges along the hose. Check both ends where the hose attaches to the dishwasher and the drain connection.
Tip: Note the exact bend points so you can correct routing without re-disassembly. - 4
Disconnect and inspect connections
Loosen hose clamps with a screwdriver or pliers and detach the hose from the sink or disposal side. Check for clogs at the fittings and wipe away residue.
Tip: Place a towel under the connections; water will be released when you loosen the hose. - 5
Flush and clear the hose
Rinse the hose with running water or a gentle blast to dislodge debris. Rotate and flex the hose to ensure all sections are clear.
Tip: If needed, use a flexible brush to loosen stubborn matter—do not insert hard objects. - 6
Reconnect and test
Reattach the hose, tighten clamps securely, restore power and water, and run a short cycle to verify drainage and check for leaks.
Tip: Observe all joints during the test; if you see leaks, re-tighten clamps or replace damaged components.
People Also Ask
What causes a dishwasher drain hose to stop draining?
Most issues come from kinks, clogs, or incorrect installation. Inspect for bends, blockages, and loose connections, then address the root cause.
Most drainage problems come from kinks, clogs, or loose connections. Inspect the hose path and fix the root cause.
Can I replace the drain hose myself?
Yes. With power off, detach the hose, select a compatible replacement, and reinstall with secure clamps. Always follow manufacturer guidelines.
Yes, you can replace it yourself if you follow the manufacturer guidelines and ensure power is off.
How often should I inspect the drain hose?
A proactive homeowner should inspect the drain hose at least once a year, or sooner if you notice drainage issues.
Inspect at least annually, or whenever you notice drainage problems.
Is water backing up into the sink a sign of a problem?
Yes. A backup usually indicates a blockage or improper hose routing. Check the hose and connections, then flush or replace as needed.
Backups usually mean a blockage or routing issue; inspect and flush or replace as needed.
Will a kinked hose cause leaks?
Kinks can squeeze the hose and create leaks at clamps or fittings. Re-route to remove the bend and test for leaks.
Kinks can cause leaks at clamps; re-route and test after reassembly.
Do I need to unplug the dishwasher to do this?
Yes. Always unplug or switch off the circuit before handling the drain hose to avoid electrical hazards.
Always power off the unit before working on the drain hose.
Watch Video
What to Remember
- Inspect the drain hose for kinks, cracks, and loose connections.
- Use the right tools and prepare for spills before you start.
- Test drainage after reassembly to confirm proper flow and no leaks.