How to Troubleshoot and Fix Plumbing Issues in a Dishwasher
Learn practical, AI-informed plumbing dishwasher troubleshooting and DIY fixes. Safe steps, essential tools, and maintenance tips to keep your dishwasher running smoothly, efficiently, and leak-free.

Goal: Diagnose and fix common plumbing dishwasher issues safely, without flooding your kitchen. This quick guide covers leaks, clogs, supply and drain hose inspections, and when to replace hoses or fittings. According to Dishwasher Tips, focusing on the water supply, the drain, and the dishwasher’s filter reduces leaks and improves drainage. No special tools required for many fixes.
What is plumbing dishwasher and why it matters
A dishwasher is connected to your home's plumbing through a water supply line and a drain hose. In most homes, the supply line comes from a cold or hot water valve under the kitchen sink, while the drain hose empties into a sink or garbage disposal via an air gap. The interaction between these components and the dishwasher's own components—pump, drain valve, and filter—determines reliability and leak potential. Understanding how these parts work helps homeowners diagnose issues quickly and safely. According to Dishwasher Tips, most common problems stem from loose connections, worn hoses, or clogged filters, not from the appliance itself. This section lays out the plumbing basics and why attention to drainage and water flow matters for performance and longevity. Without a solid understanding, minor drips become bigger leaks, cycles stall, and professional fees mount. The components interact: the water valve opens to fill, the float sensor tells the machine when to stop, the pump moves water through spray arms, and the drain pushes used water out of the tub. If any part is restricted or misaligned, you may experience long fill times, poor cleaning, or backflow. This knowledge helps you act quickly and safely when a problem arises.
Common plumbing dishwasher problems and their causes
Dishwashers rely on tight plumbing connections and clean pathways for water to flow. Common issues include leaks at hose connections, worn or cracked supply hoses, a misrouted or loose drain hose, and a stuck air gap. Leaks often originate at clamps or fittings, where vibration and temperature changes loosen seals. Not draining is frequently caused by a clogged filter, a blocked drain hose, or an obstructed air gap. Poor drainage can also result from a kinked hose or a high loop that doesn’t meet code. When water isn’t spraying effectively, it may be due to blocked spray arms, a dirty filter, or a failing circulation pump. This block also discusses how scale buildup from hard water can affect valve seating and flow. The Dishwasher Tips analysis shows that regular checks of these components prevent costlier repairs later and keep cycles efficient. Proactively inspecting the supply and drain paths reduces callouts to professionals and preserves appliance life.
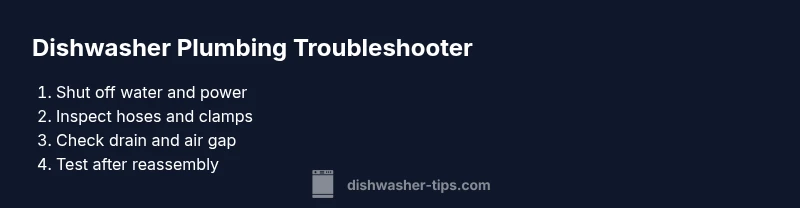
Diagnosing issues safely: steps before calling a pro
Safety first matters more than speed. Before touching wiring or power, unplug the dishwasher or switch off the circuit at the breaker. Next, shut off the water supply at the under-sink valve and place towels to catch any drips. Visually inspect all exterior hoses for cracks or loose clamps. With the appliance unpowered and dry, remove the kick panel or toe-kick cover to access the interior and verify the filter and spray arms are clean. Use a flashlight to inspect hard-to-see cavities and look for trapped debris. If you identify a damaged hose or clamp, replace it with a compatible part. If the issue seems electrical or involves the main supply line beyond simple hose changes, call a licensed pro. The goal is to safely isolate the problem and avoid further damage.
Repair and troubleshooting: do-it-yourself fixes that work
Many fixes are straightforward. Tighten loose hose clamps and replace cracked hoses; ensure the supply hose has no bulges or kinks. Clean the filter and spray arms to restore proper water flow. Clear any clog in the drain hose or air gap by disconnecting the hose and flushing with water. If a hose is beyond repair, replace both the hose and clamps, using Teflon tape on threaded connections if needed. After repairs, reassemble, turn on the water and power, and run a test cycle with no dishes to observe for leaks and proper drainage. For stubborn clogs, use a mild, non-acidic cleaner and avoid chemical drain openers that can corrode components. The emphasis is on replacing worn components rather than patching, as worn parts often cause recurring failures. This proactive approach, highlighted by the Dishwasher Tips team, ensures reliability without escalating costs.
Maintenance routines to prevent future problems
Prevention is easier than repair. Schedule a monthly visual inspection of hoses and clamps for signs of wear or corrosion. Clean the filter and rotate spray arms during routine maintenance to maintain optimal water distribution. Run a hot-water rinse to help dissolve mineral buildup and prevent scale that can hinder flow. Check the drain hose for kinks and ensure the high loop is properly installed to prevent backflow. Use a rinse aid and a water softener if you have hard water, which reduces mineral buildup in pipes and components. Keeping a simple maintenance log helps you catch trends, such as increasing cycle times or more frequent leaks, that signal an issue before it becomes expensive.
When to replace vs. repair: cost-effective decisions
Not all problems justify a full replacement. If replacement parts—hoses, clamps, filters—are inexpensive and restore full function, DIY fixes make sense. If the dishwasher shows repeated leaks after multiple repairs, or if the tub or control board shows signs of aging, replacement becomes more economical in the long run. An energy-efficient unit can save money on water and electricity and may offset replacement costs over time. Consider the total cost of ownership, including parts, labor, and the potential energy savings, when deciding between repair and replacement. The Dishwasher Tips team notes that modern models typically offer improved efficiency and quieter operation, which can be a strong incentive to upgrade when repairs grow too frequent.
Choosing parts and professional help
Selecting the correct hoses, clamps, and fittings requires matching thread sizes and connection types to your dishwasher model. Bring a photo or the model number to ensure compatibility. Replacing components with OEM parts tends to maintain warranty coverage and reliability. If you encounter persistent leaks, uncertain wiring, or high-voltage concerns, don’t hesitate to consult a licensed plumber. Regular maintenance and proper part selection reduce the chance of leaks and not-draining problems, and extending the life of your dishwasher. The Dishwasher Tips team recommends documenting all replacements for future service and filing any warranty claims with proof of parts installed.
Tools & Materials
- Safety gloves(Rubber-coated for grip and insulation)
- Adjustable wrench(6-12 inch range, grip hoses and fittings)
- Pliers (slip-joint)(Used for hose clamps and small fittings)
- Screwdriver set(Phillips and flathead for panels and screws)
- Bucket (5-10 L)(Catch water during hose removal)
- Towels or rags(Mop up spills and dry surfaces)
- New supply hose (if replacing)(Ensure compatible fittings)
- Teflon tape(Seal threaded connections)
- Flashlight(Inspect dark corners and hoses)
- Drop cloth or plastic sheet(Protect floor during work)
- Pipe wrench(For stubborn fittings)
- Leak sealant/epoxy (temporary)(Temporary patch if needed)
Steps
Estimated time: 60-120 minutes
- 1
Power and water shutoff
Unplug the dishwasher or switch off the breaker. Close the under-sink water valve to stop any flowing water. This prevents shock hazards and leaks while you inspect hoses and fittings.
Tip: If you can’t locate the breaker, switch off the main panel for safety. - 2
Inspect exterior hoses and clamps
Visually inspect the supply and drain hoses for cracks, bulges, or soft spots. Tighten or replace faulty clamps and ensure hose ends are clean and firmly seated.
Tip: Do not reuse damaged hoses; replacements are inexpensive and prevent future leaks. - 3
Check interior components
Access the kick panel and inspect the filter, spray arms, and float assembly. Clean any buildup and remove debris that blocks water flow. Reassemble carefully.
Tip: A clogged filter is a common cause of poor cleaning and longer cycles. - 4
Test drainage pathway
Disconnect and inspect the drain hose and air gap. Flush with water to remove obstructions. Reconnect and ensure the drain path is unobstructed and correctly looped.
Tip: Avoid sharp bends that can kink the hose. - 5
Replace worn parts as needed
If hoses show wear or you notice leaks at connections, replace those parts. Use Teflon tape on threaded fittings to improve seal.
Tip: Keep spare clamps and hoses on hand for quick repairs. - 6
Run a test cycle
Reconnect power and water, run an empty cycle to observe for leaks and verify drainage. Watch the entire cycle and listen for unusual sounds.
Tip: Be prepared to stop the cycle if you detect a leak and tighten connections again.
People Also Ask
What are common plumbing problems with dishwashers?
Leaks at hoses, clogged drains, faulty air gaps, and hard-water buildup are typical. Inspect hoses, clamps, and filters to diagnose and fix.
Leaks and clogs are the most common plumbing issues; start with hoses and filters.
Is it safe to DIY plumbing repairs on a dishwasher?
Many fixes are safe if power is off and water is isolated. If you encounter electrical hazards or gas lines, contact a professional.
DIY is okay for simple hose and filter fixes when you follow safety steps.
How do I know when to replace hoses instead of repairing?
Replace hoses if you see cracks, bulges, or corrosion—it's safer and often cheaper in the long run.
Replace worn hoses rather than patching to avoid future leaks.
What if water leaks after a repair?
Shut off water and power, re-tighten fittings, and re-run a test cycle. If leaks persist, consider calling a pro.
If leaks continue after a fix, stop and call a pro.
How often should I perform dishwasher plumbing maintenance?
Do a quick monthly check of hoses and filters; deep clean every 3-6 months for best performance.
Check monthly and deep clean a few times a year.
Watch Video
What to Remember
- Identify the problem by inspecting hoses, clamps, and filters first.
- Safety first: disconnect power and water before any work.
- Replace worn hoses rather than patching to prevent repeated leaks.
- Regular maintenance saves money and extends dishwasher life.
- Reserve professional help for complex electrical or structural issues.